Create a Portable Wall for Quilt Designs – Quilting Daily

When it comes to creating quilting designs, one of the most useful tools to have is a design wall. I know I’d be lost without mine (or at least, I would make good design decisions less consistently). There is something about taking your fabric pieces and other elements off the table, putting them on a wall, and stepping back from them that helps you see color and pattern combinations in a new way.
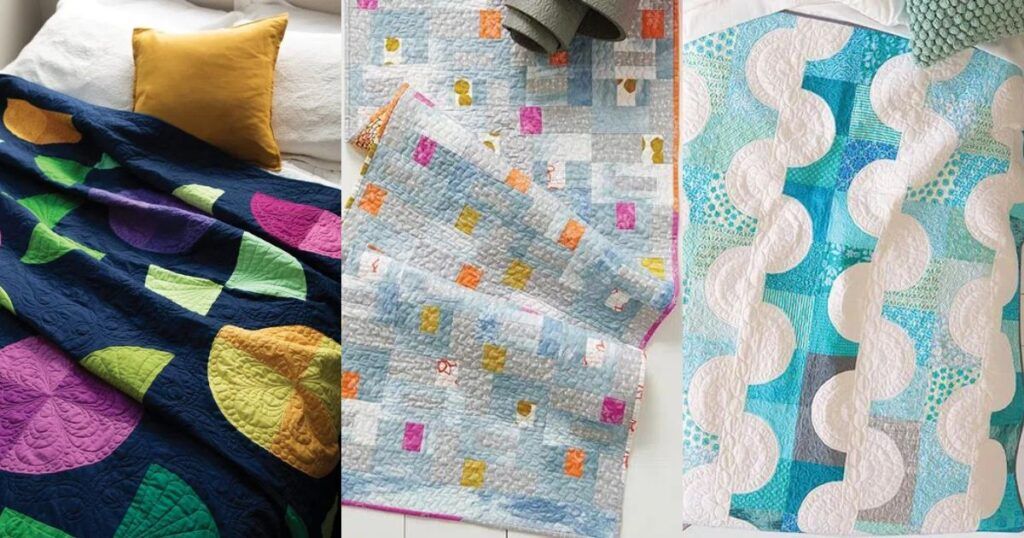
| When creating modern quilt designs with lots of white space like this ‘Seaglass’ quilt from Quilting Modern, it’s helpful to work with a design wall. |
Unfortunately, not everyone has a studio, let alone space for a dedicated quilt design wall. But there are ways to create a portable design wall, inexpensively, so you need not go without this vital quilt design tool.
All you need is a 20″ × 30″ piece of foam core board, flannel in a neutral color, such as white or beige (enough to cover the board and 6″ extra all around to wrap around the back), and duct tape or heavy packing tape. You could even use a flannel-backed vinyl tablecloth, provided any design on the vinyl side doesn’t show through to the back.
These directions are adapted from Quilting Modern: Techniques and Projects for Improvisational Quilts.
1. Place the flannel right side down on a flat surface. Center the board on top of the flannel. Make sure any markings or labels on the board are facing you so they won’t show through the flannel when the board is covered.
2. Fold the corner of the flannel in as shown in fig. 1 and secure with a piece of tape. Fold in and tape all four corners.
 |
| Fold the corner of the flannel to the back of the board and secure with tape. |
3. Fold one side of the flannel smoothly over the edge of the board to the back and secure with a piece of tape at the center. Fold the flannel over the opposite side, pulling the flannel taut, and again secure at the center with a piece of tape. Return to the first edge you taped and pull the flannel smoothly and tautly over the edge of the board, adding pieces of tape between the center and corners until the entire side is secured. Fold and tape the flannel on the opposite side, keeping the flannel taut as you tape.
4. Repeat Step 3 for the other two sides of the board.
5. Reinforce the taped edges of the flannel by placing long pieces of tape across each side of the board.
6. Flip the board over and your design board is complete.
Place your design wall where you will have at least 6′ to 8′ (1.8 to 2.5 m) between you and your design wall. Distance is important to be able to get a good perspective on your design and to see differences in value.
There are many more ideas for design boards as well modern quilting designs, piecing, and projects in Quilting Modern, now available.

P.S. What is your design wall like? Do you have tips for making a portable one? Share your tips with your community members in the comments section below.


Join the Conversation!