How to Make Simple Quilt Labels – Quilting Daily
Experienced quilters know that an essential part of finishing a quilt is attaching a label. As Jessica Alexandrakis writes in her book Get Started Quilting: The Complete Beginner Guide, “Labels can document who made the quilt, who it was made for, where it was made, and if it came from a published pattern or from the quilter’s own design.”
Quilters are always coming up with clever quilt label ideas–from creative shapes to printed ‘story’ labels. But simple quilt labels work just fine.
Here are Jessica’s directions for making a basic quilt label:
Materials and tools:
- Light-colored fabric
- A piece of freezer paper (with plastic coating on one side)
- A fabric-safe (permanent) pen or marker
- An iron
Directions:
1. Begin by ironing the coated side of the freezer paper to the wrong side of your label fabric. This will stabilize the fabric so you can write on it.
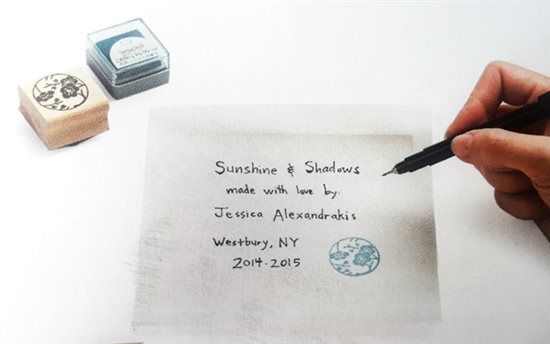
2. Document your quilt’s information with a fabric-safe pen. Consider including: the name of the quilt, your name, when and where it was made, who it was made for, the inspiration, information, and care instructions (particularly if it’s a gift).
3. Add any decorations you’d like, such as rubber-stamped images with permanent, fabric-safe ink. Remove the freezer paper and press the label from the wrong side to heat-set the ink.
4. Fold in 1/4″ (6mm) on all sides and press. Pin the label in place on the back of your quilt and whipstitch in place.
That’s all there is to it!
Whether you’re new to quilting or just new to patchwork, Get Started Quilting: The Complete Beginner Guide is a terrific resource. Jessica gives you simple instructions and clear images that show you everything from cutting fabric and sewing a 1/4″ seam to binding quilts and making a quilt sleeve. Not to mention the all-important label!

-
Get Started Quilting
Don’t get overwhelmed! Learn how to quilt with this helpful reference book featuring tips on …


Join the Conversation!