Four Ways to Paper Foundation Piece Pineapple Quilt Blocks

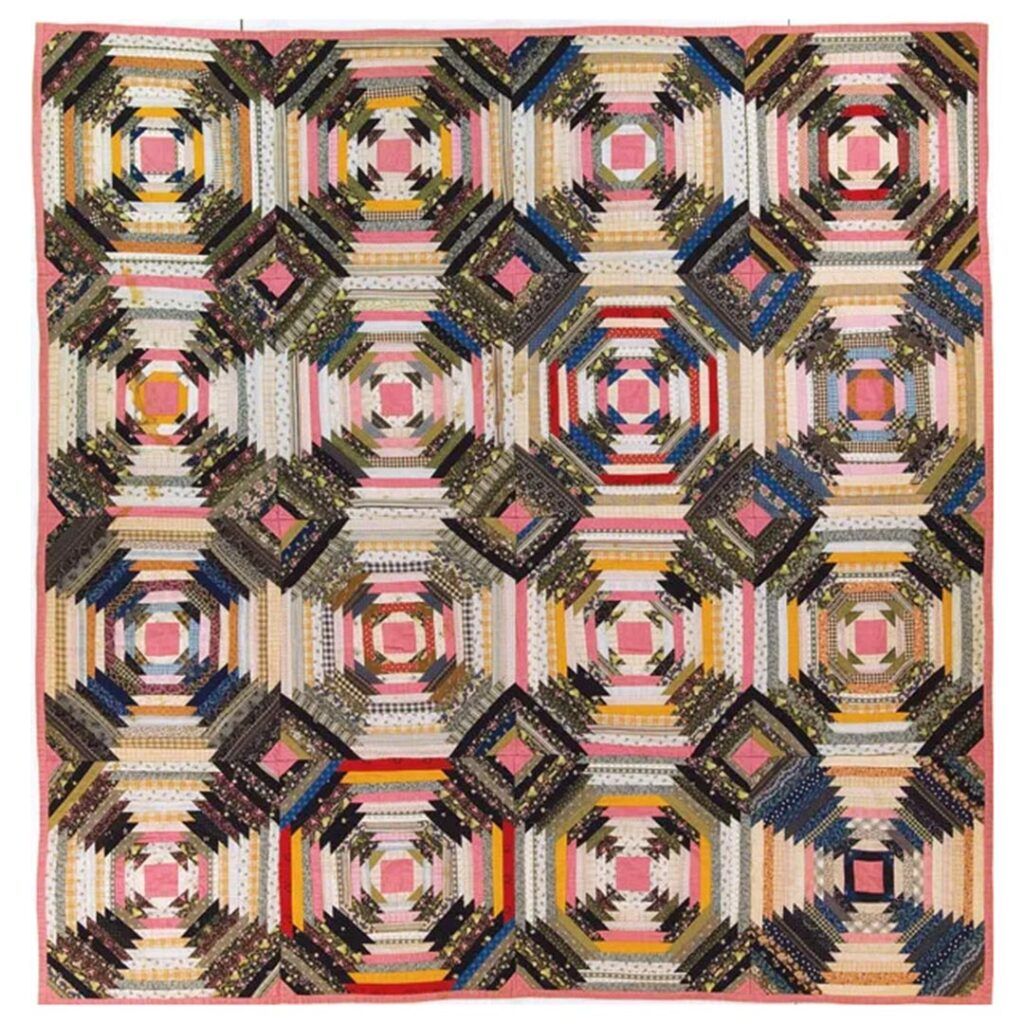
Pineapple quilt blocks, a variation of Log Cabin blocks, are famous for good reason: they’re beautiful, engaging with their how-did-you-do-that appearance, come in dozens of variations, and can be made by using up fabric scraps or with carefully composed color schemes. Likewise, Pineapple block quilt layouts are just as numerous and creative! If playing with fabrics is one of your favorite parts of quilting, then this block is for you!
Although Pineapple blocks may be made without templates for larger blocks and those with fewer rounds Welcome to Our Home, by Susan Deshensky, the most common way to make them is with paper foundations. I love the precision and consistent outcome of paper foundation piecing, but removing all those paper bits afterward? Not so much! And for me, I’m at a point where repetitive finger-joint motion is a thing I try to avoid—it hurts.
So, our team thought, how could we make Pineapple quilt blocks using base fabric that doesn’t have to be removed instead of paper foundations? We came up with four ways!
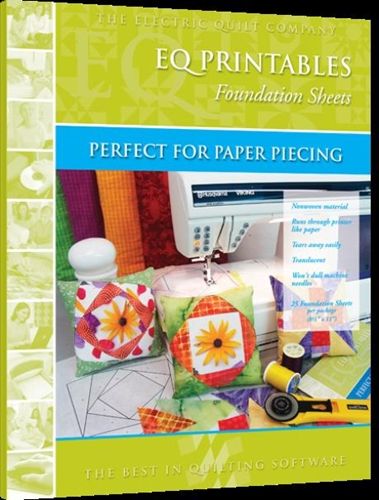
1. Printable fabric sheets. There are several options for printable fabric sheets suitable for inkjet printers, the most common type of home printer. One example of printable fabric sheets is EQ Printables by Electric Quilt. Print-Stitch-Dissolve by Pellon is another example; it dissolves when submerged in water. Be sure to print a single test foundation on regular paper first to check your template for accuracy!
It’s also possible to press freezer paper to the back of your own fabric so it can feed through your printer. Once cooled, rotary cut 8 ½” x 11″ rectangles for your printer, and peel off the freezer paper before stitching. Again, test a sheet in your printer before proceeding, and watch out for any loose threads that could cause your printer to jam!
2. Needle-pierce and chalk pounce. For this approach, you’ll have less waste of the foundation fabric because you don’t have to cut to printer size! Print one paper foundation paper copy. Then, use a large-diameter needle to poke holes approximately every ¼” along the patch lines and the outer ¼” block seam allowance to create your stencil master.
Lay your paper foundation master over your foundation base fabric and pounce! I’ve heard that a light mist of hair spray can help prevent the chalk from rubbing off while you work, but if you try that, be sure to wash it out of your quilt when it’s finished because I have no idea about the long-term effects of hair spray on a quilt!

3. Trace using Saral transfer paper. If you’re like me, you may have your hand in several different crafts, including embroidery or garment sewing; this is one of those places where arts overlap, and you may have some Saral transfer paper lying around in your supplies! After printing a paper foundation master, sandwich the transfer paper between the foundation paper and your base foundation fabric. Use a tracing stylus to outline the patches and the outer ¼” block seam allowance. (A tracing stylus is shaped like a pencil and has a steel ball point on both ends. You can also use a pencil to trace, but for multiple tracings, a stylus is less messy!)
4. Trace using a lightbox. Place a single paper foundation master on top of your light box, then place your base foundation fabric on top. Trace the patch outlines and the outer ¼” block seam allowance onto your fabric. Foundation piece your base fabric, then trim your base fabric to the outer marked block seam allowance.

You can use these techniques for any paper pieced foundation block, not just Pineapple blocks!
Tips:
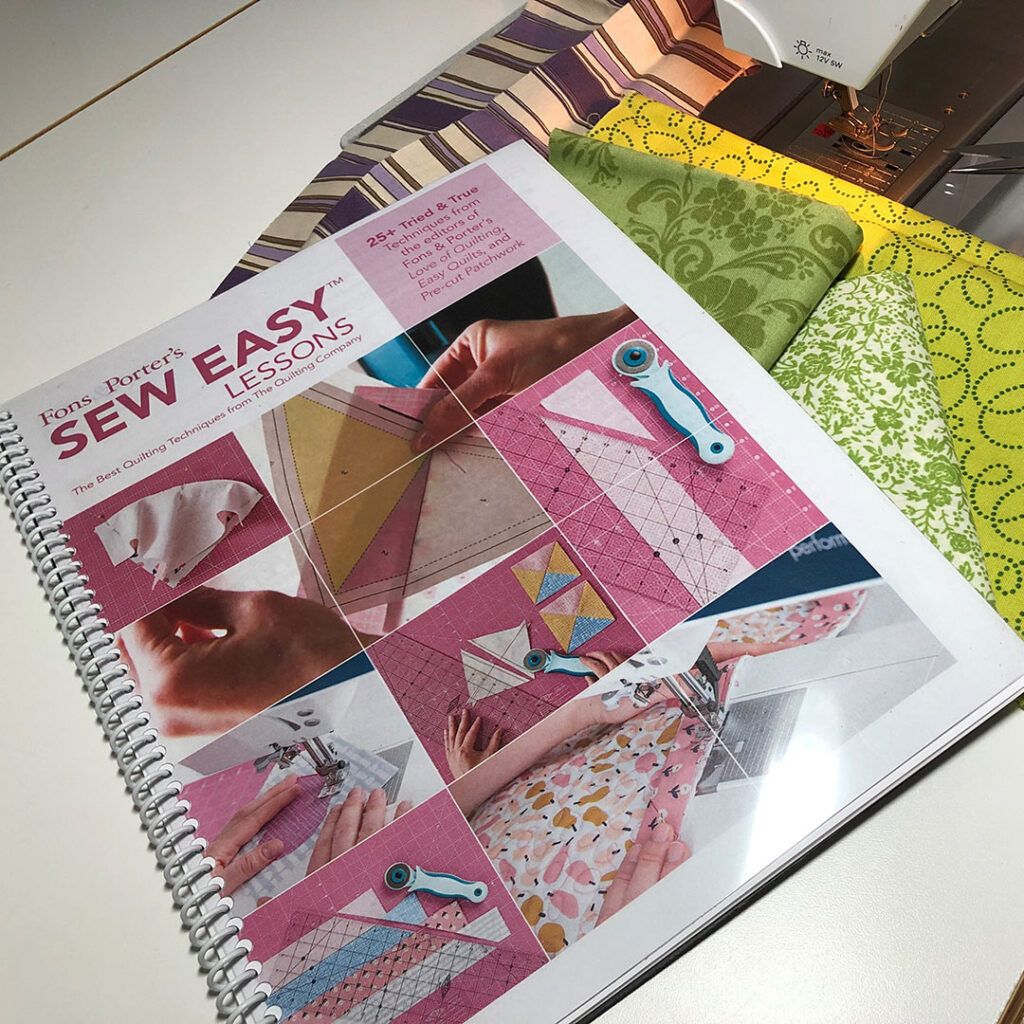
Find complete instructions for Paper Foundation Piecing in our free Sew Easy™ Lessons download.
Bleached muslin makes a great foundation base fabric. (Unbleached could have dark speckles that may show through white fabrics.)
Consider prewashing your base foundation fabric before you prepare it in case it has a higher shrink rate than your quilting fabrics.
Allow approximately ½” extra past the outer ¼” block seam allowance on your base fabric before foundation piecing. After you’ve foundation pieced your block, trim the block to the outer ¼” block seam allowance line.
I recommend washing your quilt when it’s finished to make sure any marking residues are removed. (I don’t consider my quilts finished until I wash them because I love the added texture that highlights all the quilting and makes them snuggly!)
When printing foundation copies, you can choose to scale them down. For example, reduce an original 8″ block foundation by 75% for a 6″ block or 50% for a 4″ block. Be sure to re-draw a new ¼” outer block seam allowance on your printout because that will have shrunk, too!
Pineapple block quilt patterns to try:


We want to know…what are your thoughts on pineapple quilt blocks?


Join the Conversation!